WordPress 3.0 was recently released as a major update to the WordPress content management system. In this post I will explain some of the bigger features included with WP 3.0.
1. WordPress MU merged into WordPress
WordPress Multi-User, better known as Wordpress MU, has existed for years as an offshoot of WordPress. WordPress 3.0 merged all of the MU functionality into the core of WordPress, which means that you can now run multiple sites from one installation of WordPress. This is particularly useful for BuddyPress community-driven sites, as you may want to give each of your users their own website. You can manage themes, plugins, upgrades and users all from the backend of your primary WordPress site.
How to enable MultiSite funcitonality in WordPress 3.0
You will need to enable the MultiSite functionality to take advantage of it. But don’t worry, it’s pretty easy to do.
Step 1:
Back up your files and database first, just in case something goes wrong. Enabling MultiSite will update your core files and your database.
Step 2:
Open up your favorite text editor and navigate to the file called “wp-config.php.” It will be in the root directory that you have WordPress installed in.
Then add the following line above where it says /* That’s all, stop editing! Happy blogging. */:
define(‘WP_ALLOW_MULTISITE’, true);
Step 3:
You should now be able to administer your MultiSite Network by logging into the admin and going to Tools » Network.
You will need to choose between sub-domains or sub-directories. Each additional website in your network will be created as a new virtual subdomain or subdirectory, depending on your choice. You cannot change this setting later without reinstalling WordPress. I personally recommend using sub-directories.
- Sub-domains: like site1.yourwebsite.com and site2.yourwebsite.com
- Sub-directories: like yourwebsite.com/site1 and yourwebsite.com/site2
Step 4:
WordPress will ask you to create a folder called “blogs.dir” and to add some extra code to your wp-config.php and your .htaccess files. Open up your text editor and manually add the code as instructed by the system.
Step 5:
Log back into your WordPress / BuddyPress admin. You will now see a new menu section called “Super Admin.” The menus in this section are for adding and managing additional sites within your network. Your base WordPress install is now the primary site in your network.
White in the admin, go to the Super Admin > Options panel to configure your network options. From here you can create new sites and users.
2. Choose your own administrator username / password
In the past whenever you installed WordPress, you needed to use “admin” as the administrator username. You also needed to use a randomly generated password, which you could change once you logged into the site.
In WordPress 3.0, you can choose both your username and password when installing WordPress. I find this to be simpler than the old method and a worthy update. It’s also more secure, as hackers now have to figure out both the username and password to your site. Before they knew “admin” would always be ones of the usernames.

3. Custom post types
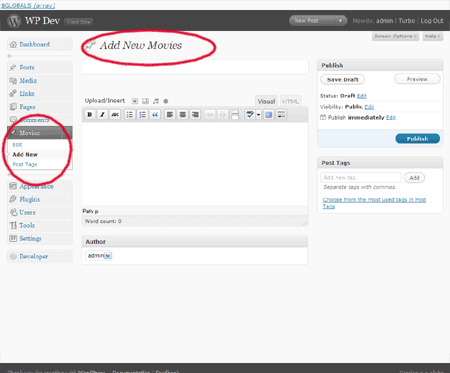
Previously you could only add pages or posts to your WordPress site. With WordPress 3.0 you can create custom post types, for adding custom content such as Portfolio listings, Movies, Products, Maps, etc. This feature is not meant to replace categories or tags and shouldn’t be used for that. It’s mostly a tool for developers to create more advanced plugins that have tighter integration with the admin and the front-end of the website.
4. A new default theme called Twenty Ten
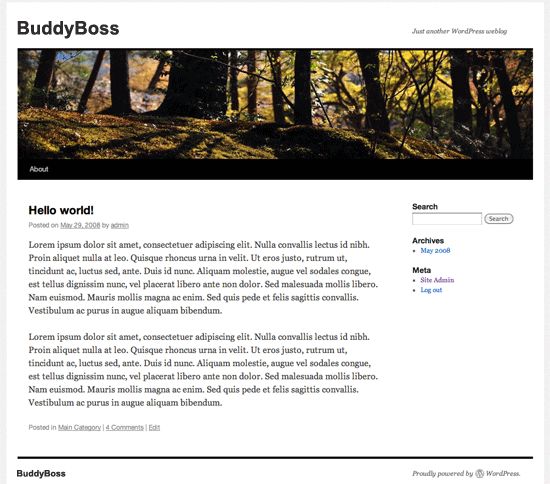
WordPress finally ditched the extremely dated “Kubrick” theme for a new default theme called Twenty Ten, aka 2010. They have stated that they will release a new default theme every year so the default theme will always remain up to date.
Twenty Ten is a beautiful theme. In the WordPress admin you can change the theme’s header and background image and you can also add “widgets” to multiple widget areas in the theme. The theme has drop-down navigation built in, which is a welcome addition. Overall it will be a great base for developers to build custom “child themes” from as it works well as a “parent theme.”
You can view a live demo of Twenty Ten here: http://2010dev.wordpress.com/
5. Easily build custom menus
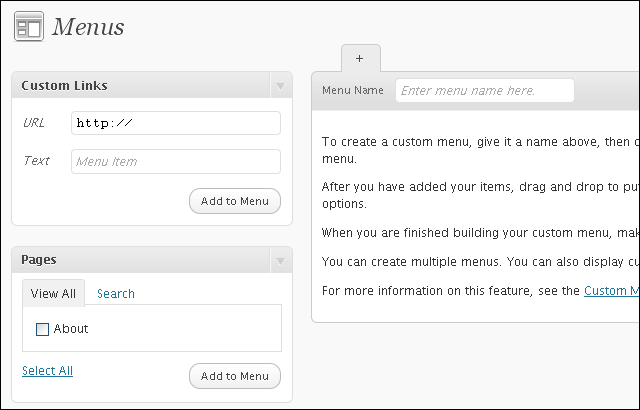
This is a feature that WordPress could have used a long time ago. Previously you needed to use plugins or custom code to build custom menus (site navigation). With WordPress 3.0 you can easily build your own site menus using a friendly drag-and-drop interface. You can combine Pages, Categories, as well as both internal and external Links into a single menu. You can easily reorder the menu items within the admin as well.
To use build your own custom menu, log into your WordPress admin and go to Appearance > Menus.
How to activate WordPress 3.0 menu management
If your theme does not have custom menus enabled, you can enable them by adding the following code to the functions.php file in your theme.
if (function_exists(‘add_theme_support’)) {

add_theme_support(‘menus’);

}
To display the custom menu in your theme, copy and paste the following wherever you want it to display:
<?php wp_nav_menu(‘menu=first’); ?>







 © All rights reserved, BUDDYBOSS LLC 2024


